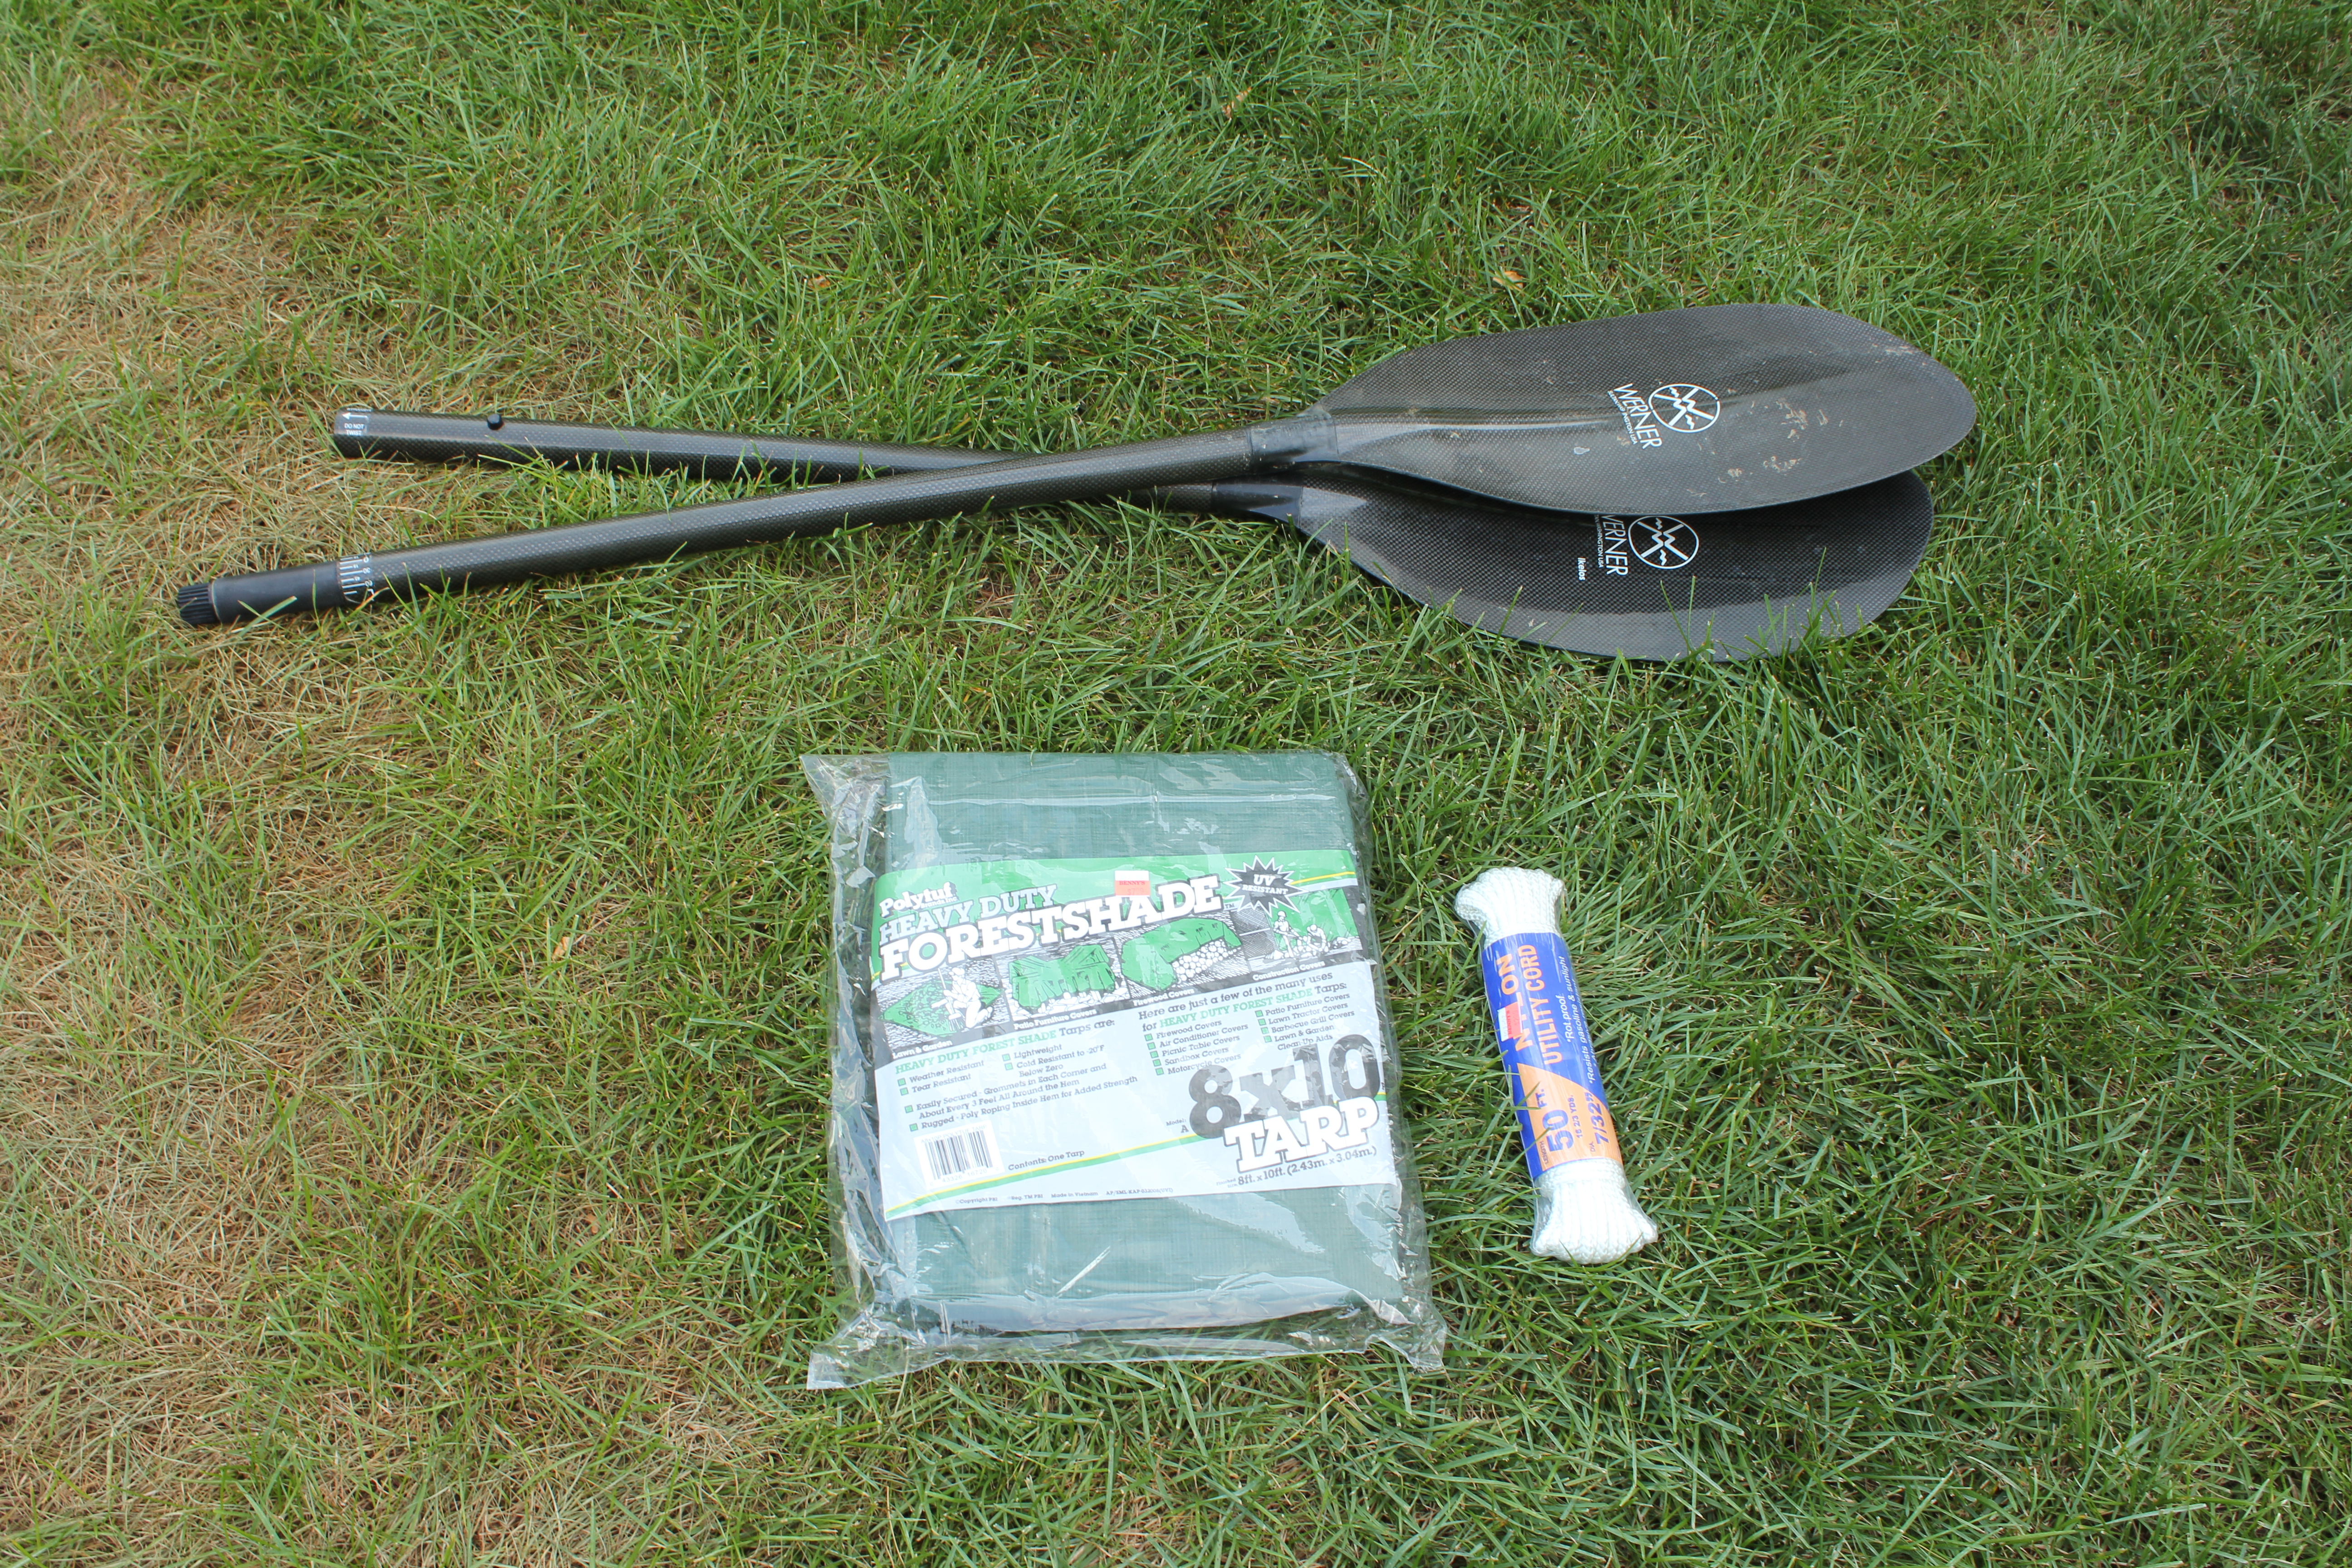
What if I told you that all you needed to carry in your kayak to build a shelter was am 8x10ft tarp, about 30 feet of rope or cord, and maybe that two piece paddle that got you to your cast-away campsite? Better yet, what if I told you that these basic shelter supplies cost under $10.00 at your local hardware store? This magical haven that I speak of isn’t a fish tale…it’s a tarp tent!
Tarp tents make for a great shelter because they’re simple, versatile, light-weight and can be ultra-low cost. Literally all you need is a tarp, some rope, and two trees (or paddle halves) to pitch it between! The thing that should jump out to a kayak camper is that most of what you need to build a tarp tent (the rope and maybe a paddle) is already on board. The addition of a tarp to your standard gear shouldn’t add much weight (1-2lb) or impact your wallet. From there, pitching the tarp tent is mostly a matter of imagination and necessity. In this post, I’ll show you a couple of basic tarp tent configurations and provide some tips to set you on your way:
Basic Tarp Tent Materials:
- 8×10 ft tarp (this size is “comfy” for two people)
- 30ft of rope or parachute cord (a towline is about this long)
- 2 supports (these can be two trees, two paddle halves, or a combination of a tree and paddle)
- 4-6 tent stakes (these can be store-bought or constructed of sticks or rocks)
Tarp Tent Configurations:
There are literally dozens of ways to pitch a tarp tent. Here we’ll focus on the usefulness and construction strategies associated with some of the more common designs including: the A-frame, the Lean-to, and the Over-kayak.
The A-Frame:
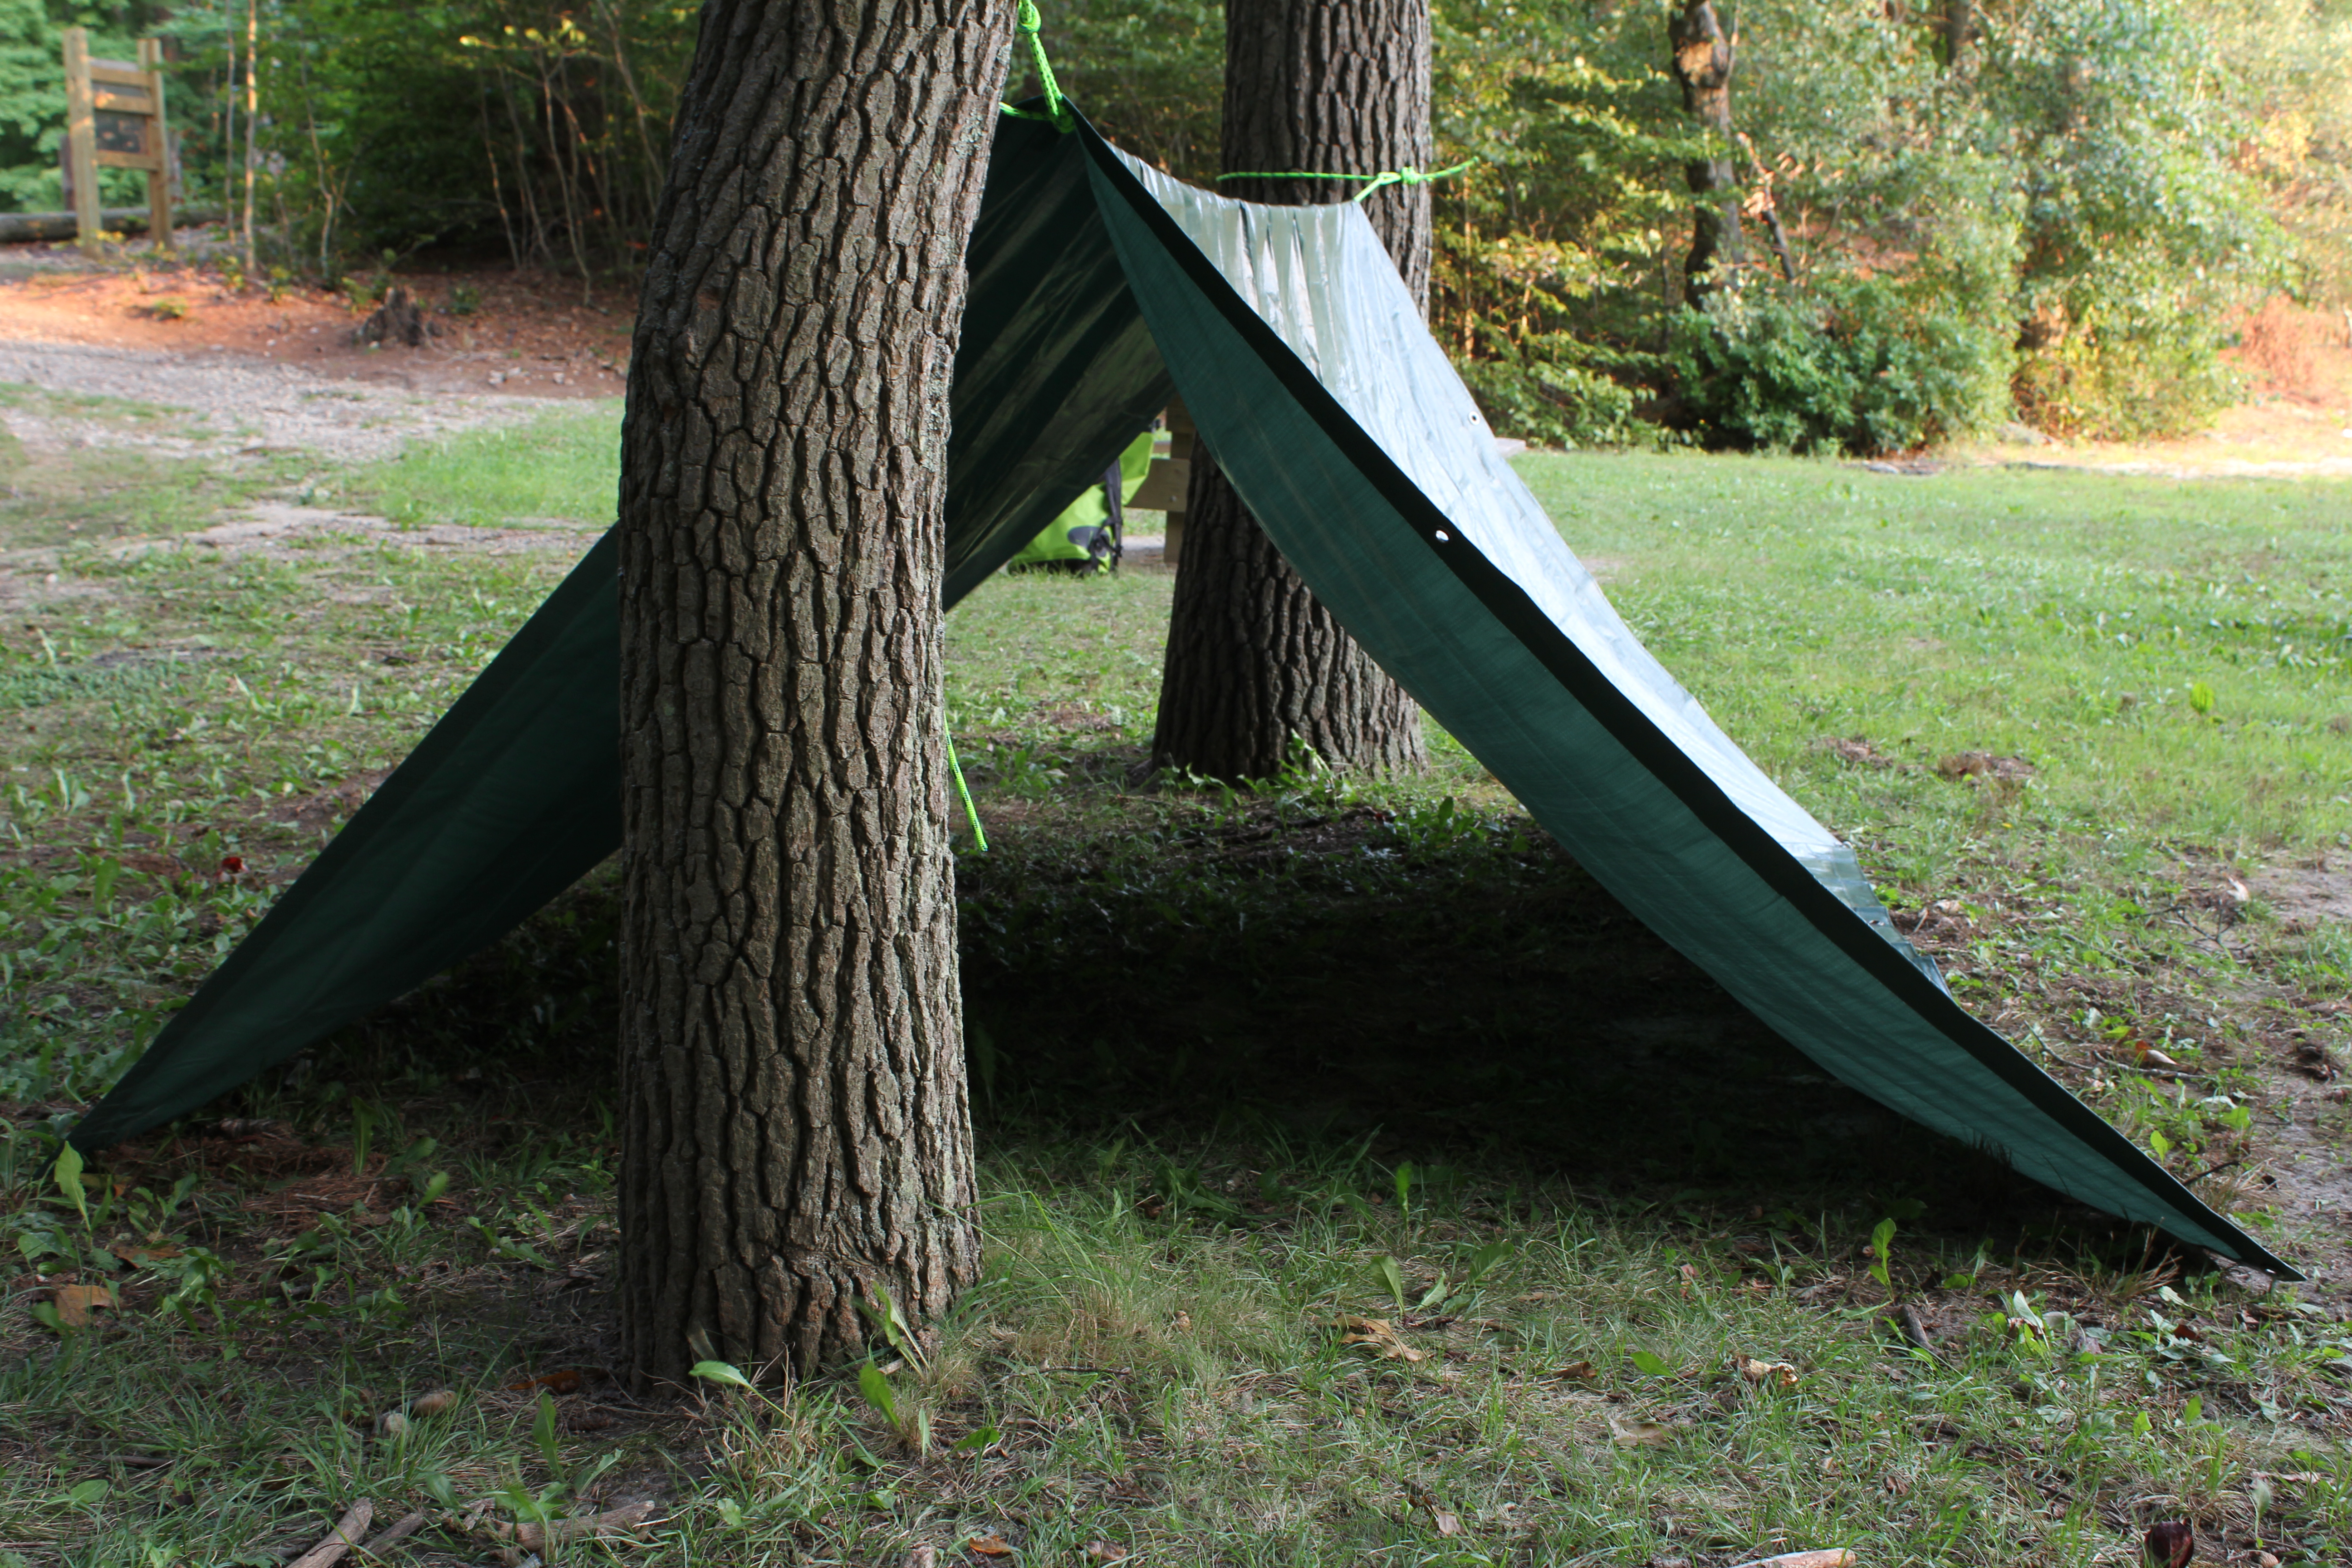
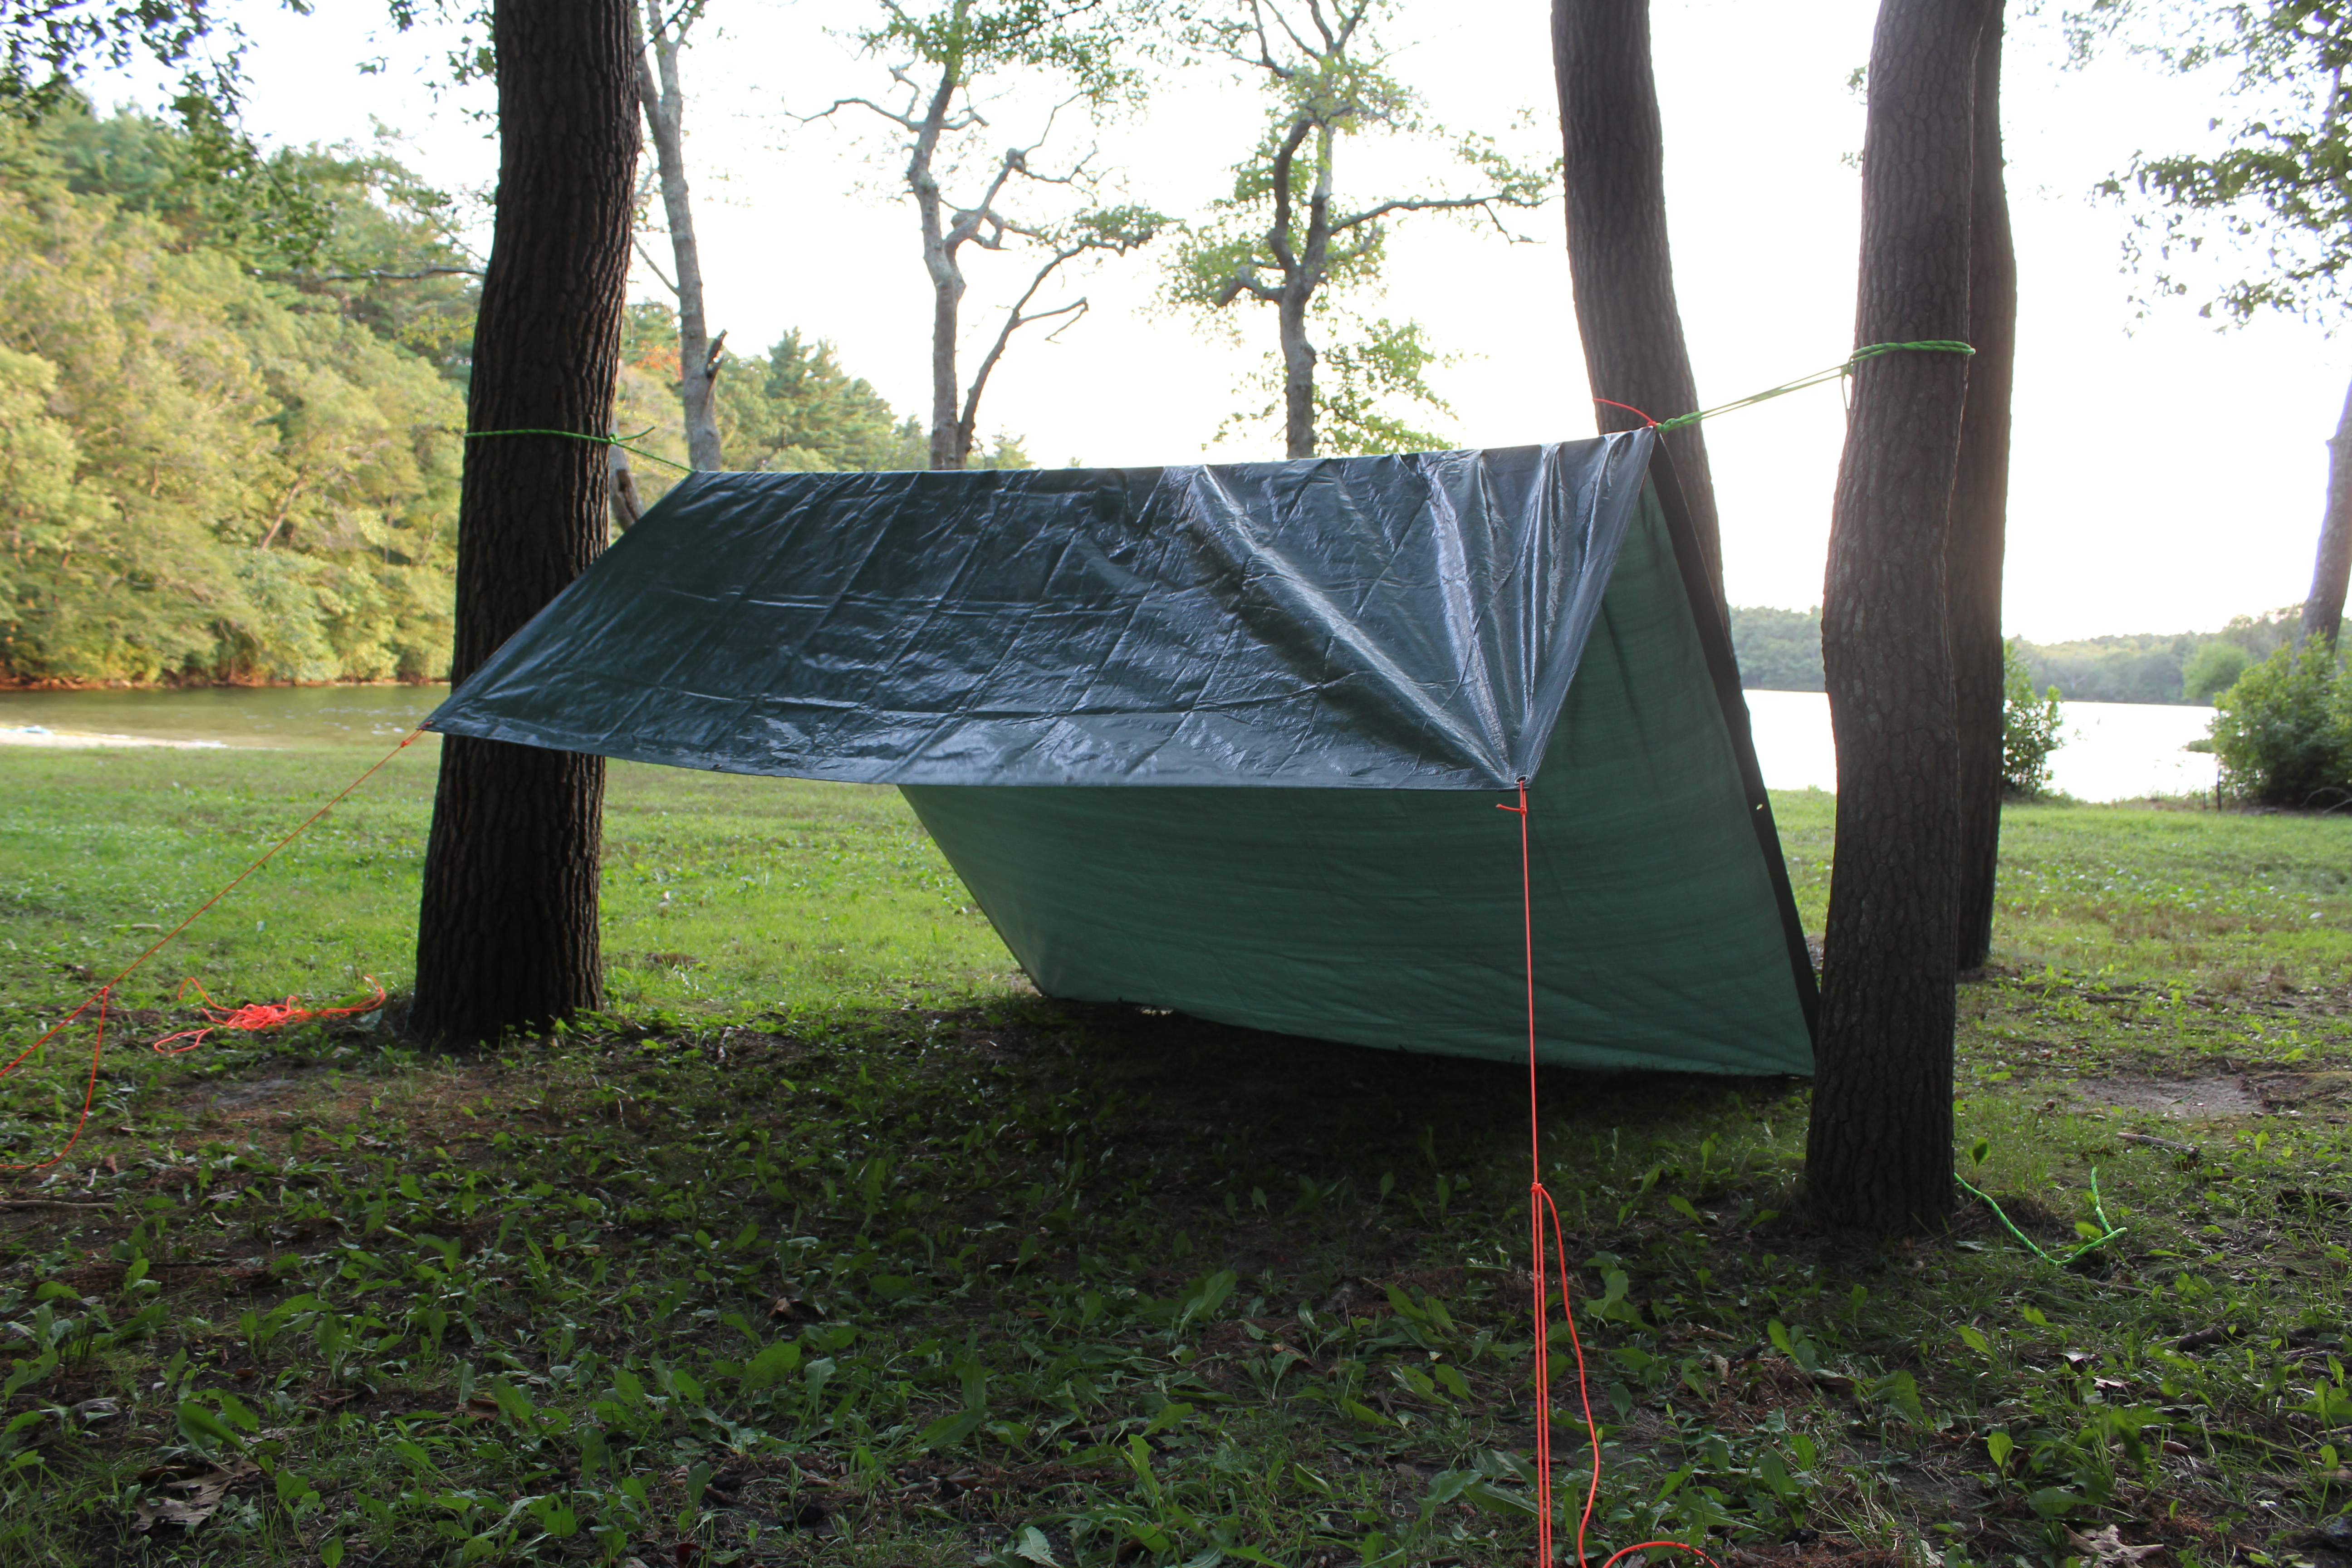
The A-frame configuration is a sturdy design that offers warmth and protection from the elements. The benefits of this design are well worth the additional time that it takes to set up, especially if poor weather (lots of rain) is in the forecast or you plan to stay a camp for a few days.
The easiest way to set up an A-frame tarp-tent is by pitching it between two sturdy trees that stand 12-15 feet apart. Start by stringing the rope between the two trees to create the ridge line. This can be accomplished by girth hitching one end of the rope about 4 feet up from the base of the first tree. From there, span the gap and tie a trucker’s hitch about 4 feet up from the base of the second tree. Pull the line taught and secure with a half-hitch. Next, lay the tarp over the ridge line such that the 8ft length is parallel to the line. Use short parachute cord ties (about 1ft long) to secure the center grommets to the ridge line. Finally, stake out the ends of the tarp to create the “A” shape.
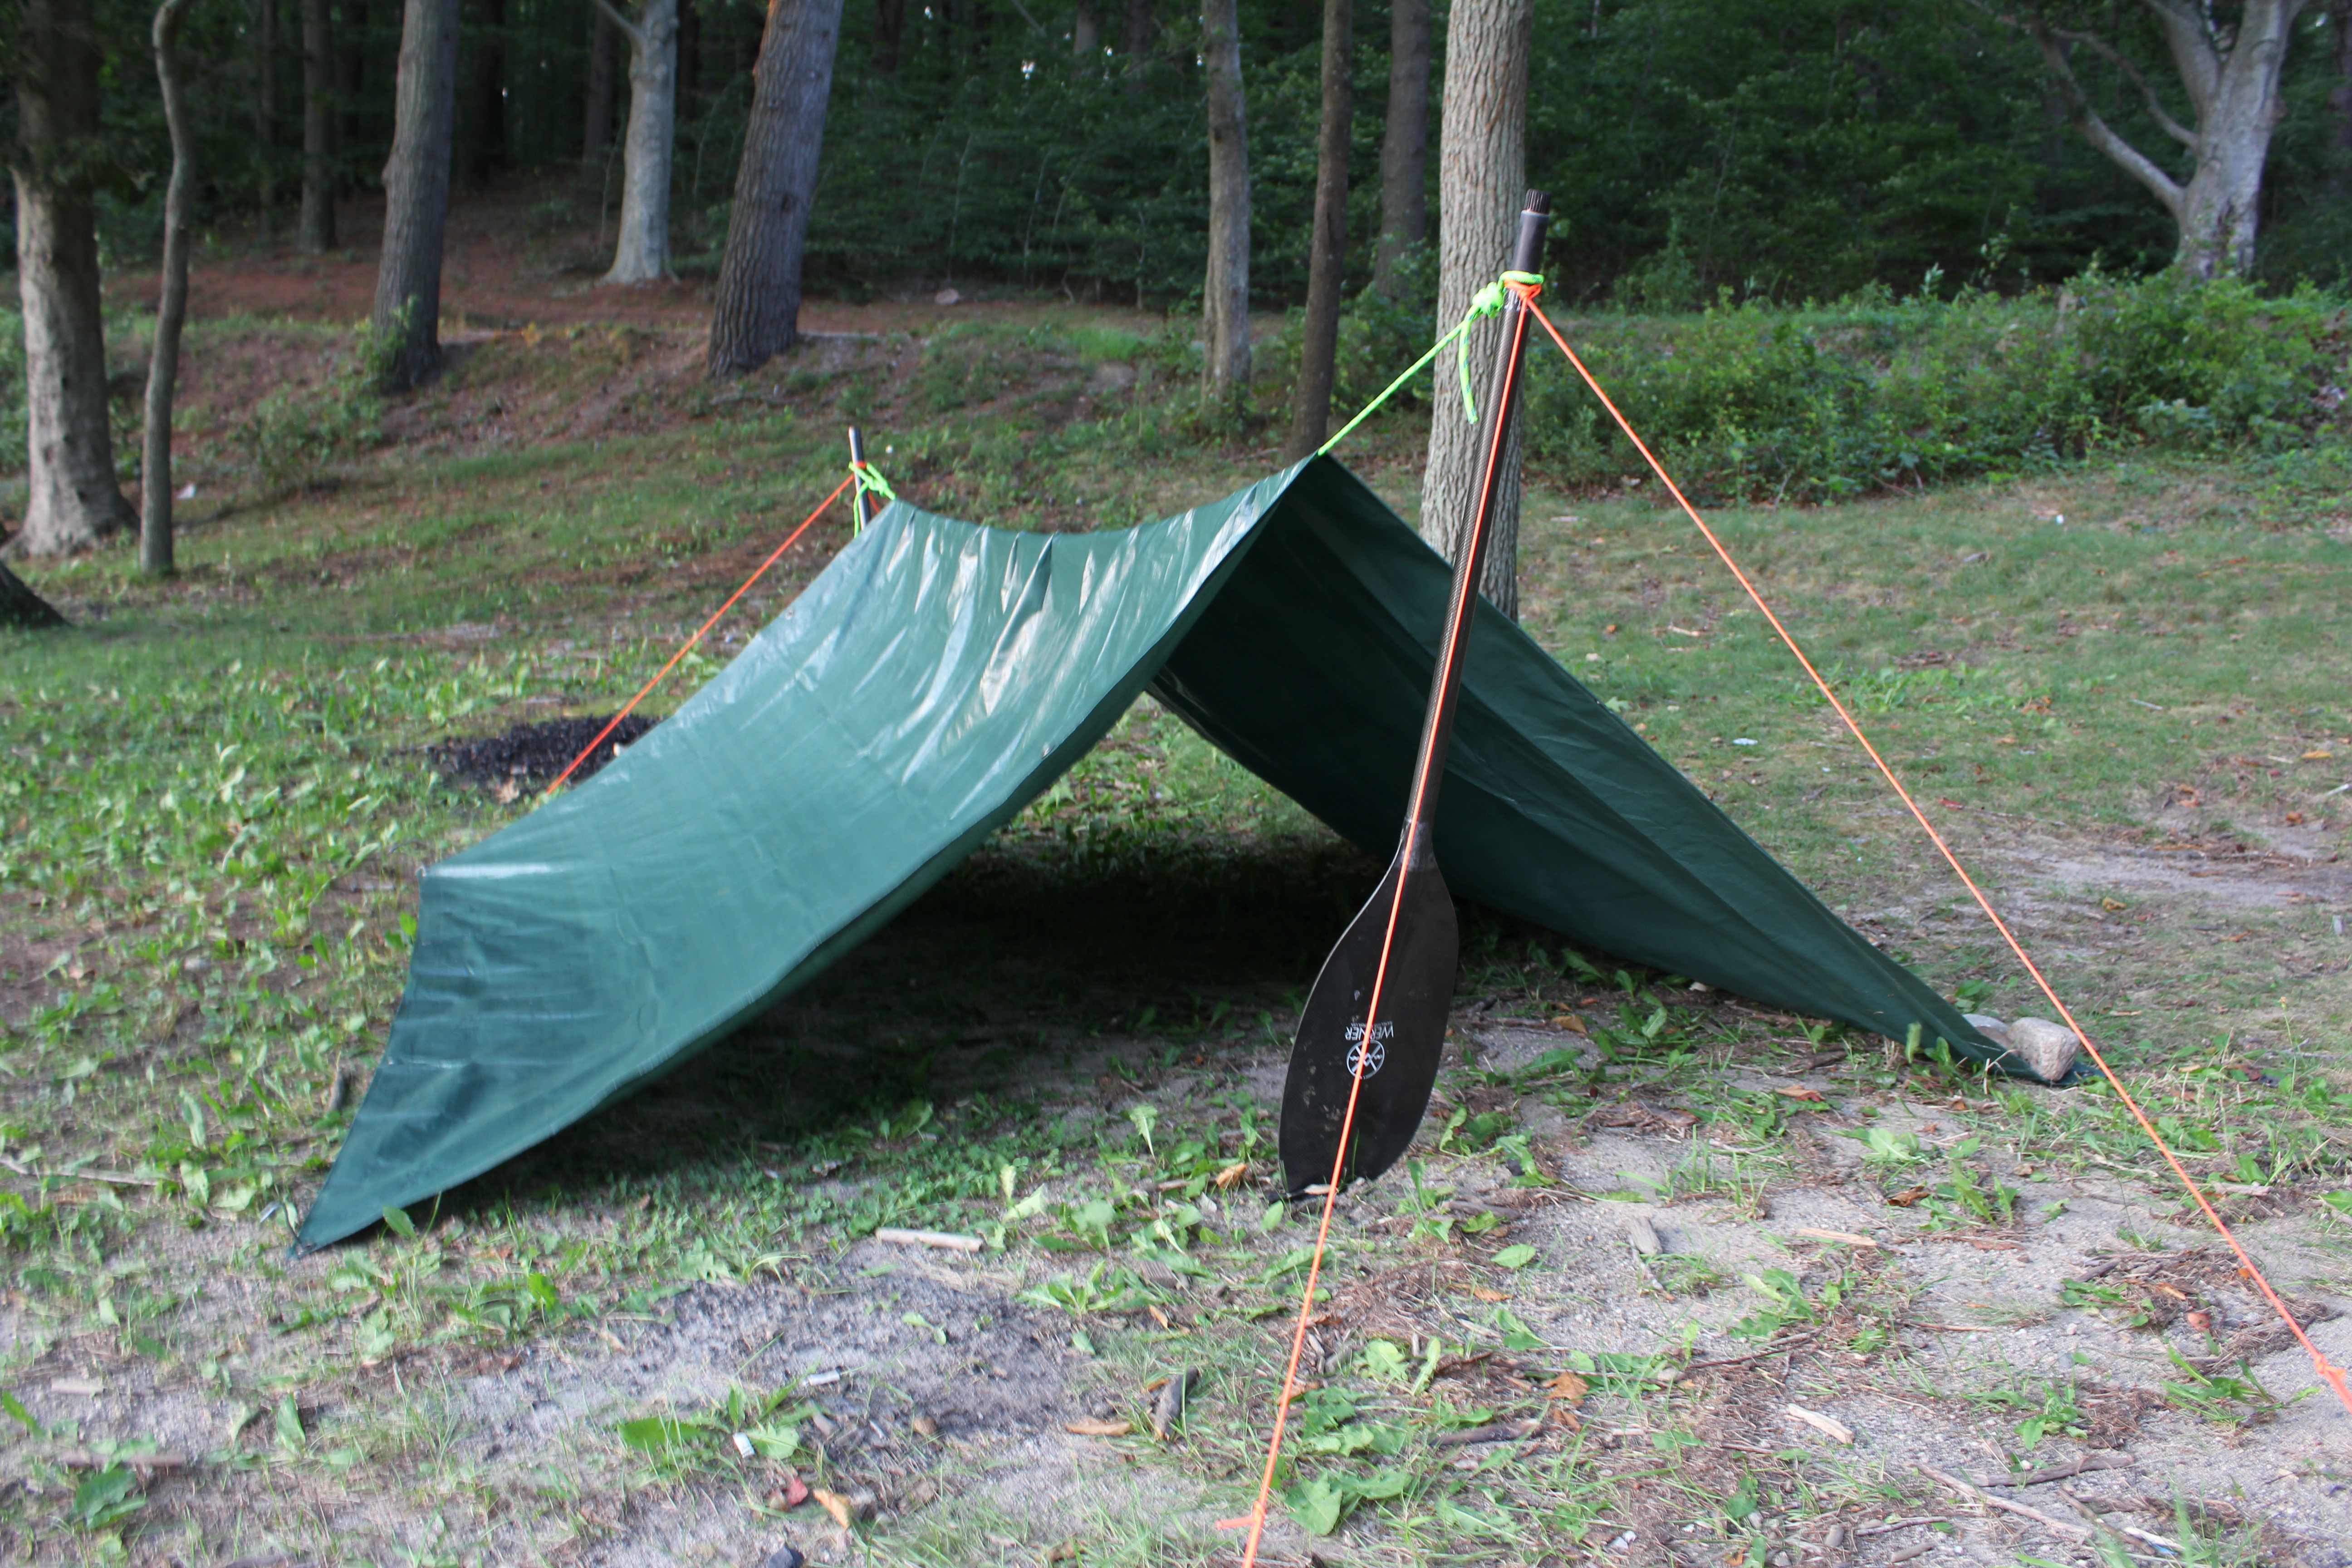
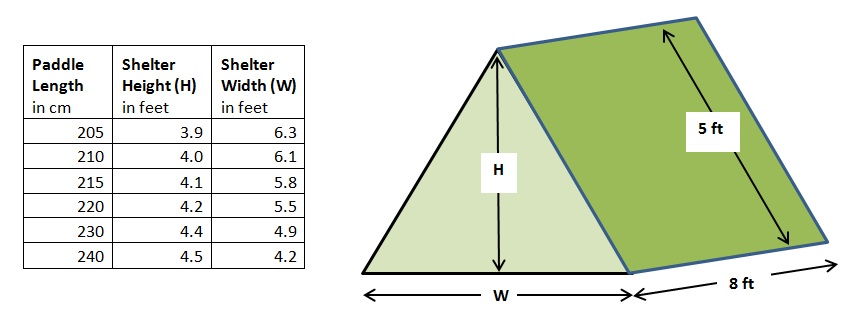
Don’t fret if there are no trees on your cast-away island; you have all that you need to make some poles in your trusty, two-piece paddle! Using paddles takes a bit longer to set-up as you’ll need to create two tripods to string the ridge-line between. A tripod consists of two stakes, a 10 foot-long piece of parachute cord, and half of a two-piece paddle. To build a tripod start by tying bowline knots into both ends of the 10 foot length of parachute cord. Next, stake the two ends of the parachute about 3-4 feet apart. Find the center of the parachute cord and wrap this around the ferrule on the paddle shaft. Lift the paddle-half to create tension and the desired tripod. Build a second tripod about 12 feet away. String the ridge-line between the apex of these two tripods and complete the A-frame as usual! Here’s a handy chart provides the dimensions of you’re a-frame based on the length of your paddle and assuming that you’re using an 8x10ft tarp:
The Lean-to:
The Lean-to configuration serves as an excellent alternative to the A-frame structure by offering a bit more head room and versatility. This structure provides protection from the wind on one side while leaving the opposite side open to your campsite. A campfire and reflector to be built a close (but safe) distance away from the open side such that the heat can be reflected back into the shelter to warm its occupants. The lean-to is best used when camping in descent weather or in cooler temperatures where the warmth of a fire may be necessary. It’s also useful as a day-time shelter from the sun.
Like the A-frame configuration, the Lean-to is most easily pitched between two sturdy trees that stand 12-15 feet apart. Start by stringing the rope between the two trees to create the ridge line about 5-6 feet off of the ground. Girth hitch one end of the rope to the first tree, span the gap between the trees, and tie a trucker’s hitch to the second tree. Pull the line taught and secure with a half-hitch. Next, lay the tarp over the ridge line such that the 8ft length is parallel to the line. About 2/3-3/4 of the tarp should fall on the side facing the wind to create the back of the shelter. Stake out the back wall of the shelter using rocks, sticks, or stakes. Now move to the front of the shelter to create an awning with the left over tarp. Tie 6ft lengths of parachute cord to the corner grommets and stake out to create a small awning on the front of the shelter. A taught-line hitch may be useful to tighten the guy-lines on the awning. Finally, use short parachute cord ties (about 1ft long) to secure the tarp to the ridge line to keep it from shifting.
Note: The ridge line may be lowered to provide more protection from inclement weather.
The Over-Kayak:
The “Over-Kayak” configuration is probably the simplest and fastest tarp shelter to construct. All you need is your kayak, a tarp, and a few rocks collected from the beach to build this bivy-like structure. The Over-Kayak shelter makes for some tight quarters but its low-profile is great for deflecting the wind and keeping you warm. It’s best reserved for emergency situations or a quick overnight when you don’t want to spend time building a more elaborate structure.
To construct the over-shelter, start by laying the tarp flat on the ground. Then place your kayak along one of the 8ft long sides of the tarp to hold it down. For maximum head room consider placing the kayak upside down or on edge. Pull the other end of the tarp over the kayak and secure the loose end to the ground with rocks or stakes. The shelter space can be adjusted by folding excess tarp under to serve as a “ground tarp”. Special consideration should be given to the wind direction such that the kayak serves as a wind block.
Tips and Tricks:
- Utilize trees as your vertical supports if they’re available. It can be difficult to set up a tarp tent using paddles if you’re on your own or if it’s windy.
- Consider the direction of the wind when pitching your tarp tent. Pitch the tarp tent such that the wind hits the walls and not the entrances.
- Consider your site selection carefully. Avoid pitching your tarp tent in areas that may become flooded during a passing storm. Also, always inspect the tree canopy above your site for hanging limbs which may fall down in the wind.
- Never store food in your tarp tent. Food will attract uninvited guests and there’s not much keeping them out of a tarp tent!
- Consider bringing a second tarp to serve as a ground cloth.
- Practice makes perfect. Spend some time building various tarp tents in your local park on a nice day so that you’re confident in your designs when you enter the back country.
Commercially Available Tarp Tents:
There are a number of tarp tents available on the market these days. Commercially available tarp tents are typically constructed of better materials that are more lightweight, durable, and waterproof than the standard $10 tarp. They also may have more lash-down points and may be cut into a more useful shape such as a hexagon. The obvious downside is that these shelters carry a price tag (>$100.00) that’s equivalent to most mid-grade, 3-season tents. Here are a few tarp tents that I’ve looked into along with links to some great reviews:
- Equinox Egret Tarp Tent… Product Page. Independent Review.
- MSR Ewing Tarp Tent… Product Page. Independent Review.
- Integral Designs Sil Tarp 2… Product Page. Independent Review.
I hope that you enjoyed this post and will consider trying out a tarp tent on your next kayak camping adventure. Be sure to check back for many more kayak camping tips and gear reviews in future!
-Kayak Dave


2 Responses to How to Build a Tarp Tent for Kayak Camping