Aside from constructing a tarp tent there’s another (and arguably more clever) way that a tarp and 30ft length of rope can turn out to be quite useful to the kayak camper; for constructing a Yukon-style portage pack! The Yukon pack, also known as a Hudson Bay Company Pack, makes use of basic camping materials to fashion a make-shift back pack. These packs are particularly useful and practical for short-hauling gear from the landing to the campsite and effectively eliminate the need to carry a formal portage pack amongst your kayak camping gear.
A quick Google search will turn up many inventive ways to construct a Yukon pack. After messing around with a few different techniques I’ve come up with my own take:
Yukon Pack Materials:
- 8×10 ft tarp or ground cloth (a larger tarp would work well too)
- 30ft of rope or parachute cord (a towline is about this long)
- Optional: 2x 18inch sections of pipe insulation wrapped with duct tape for shoulder straps.
Steps for Building a Yukon Pack:
Step 1: Organize and Pack Your Items
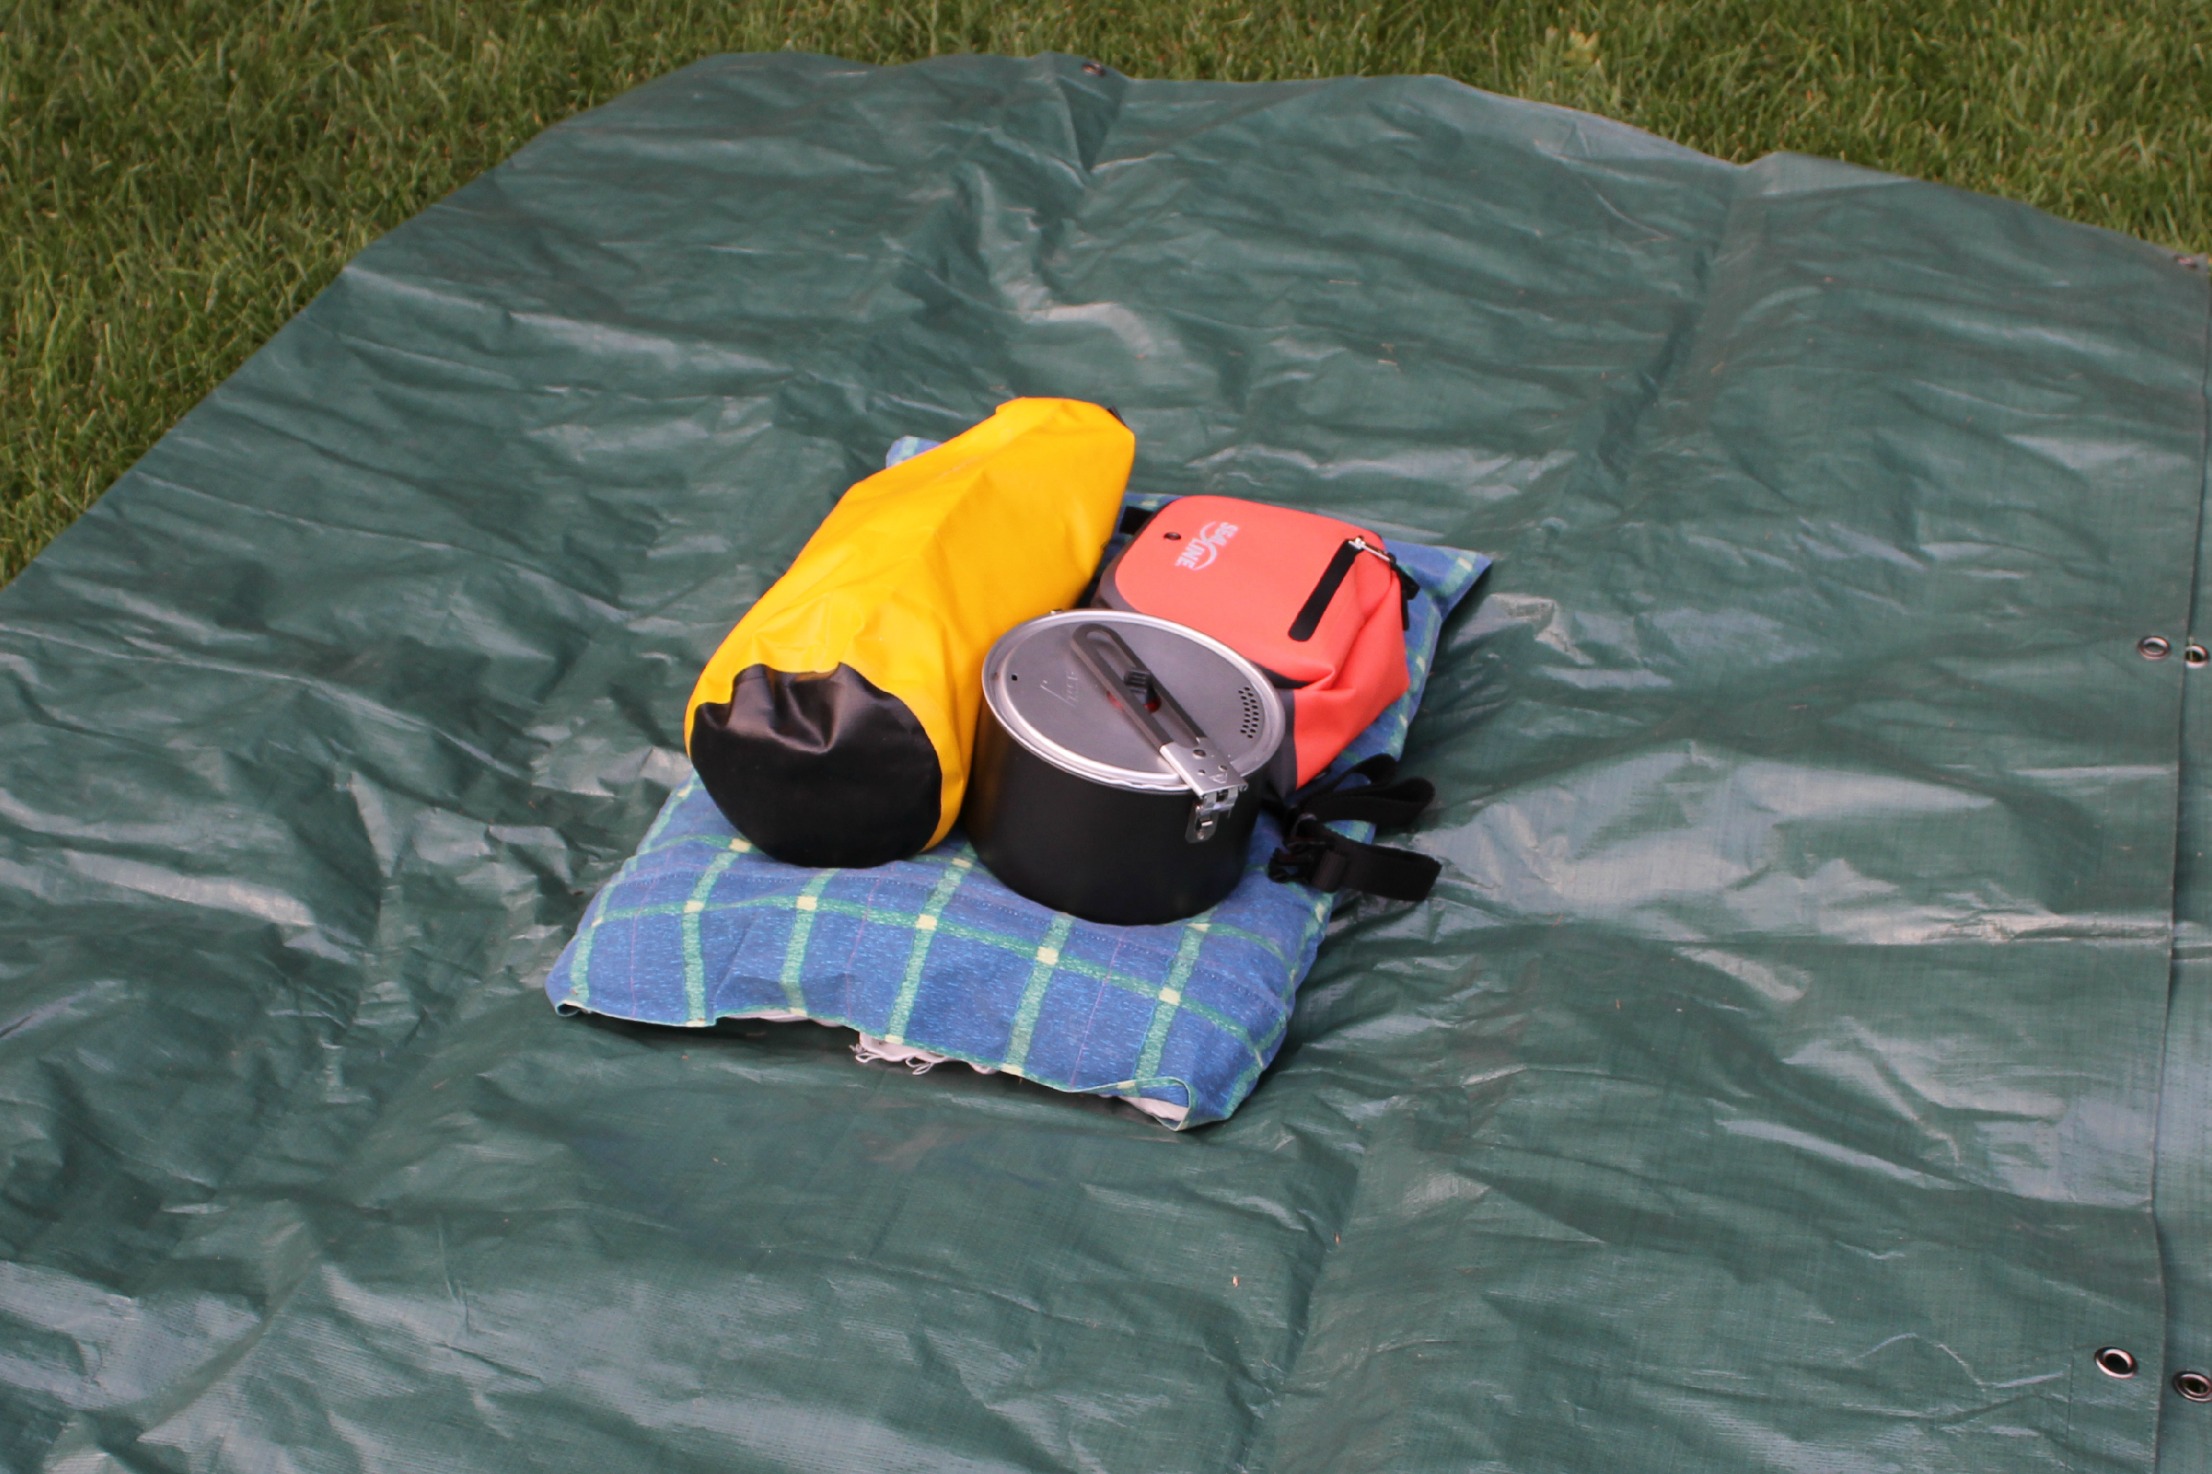
The comfort of the Yukon pack on your back has everything to do with how you organize your gear within the tarp. Start by laying the tarp flat on the ground and fold it in half. Then begin to pack your gear on top of the folded tarp. The gear should be concentrated near the center of the folded tarp such that the longest edge runs top to bottom.
The first layer to be packed should consist of the softest items of gear (sleeping bag, extra clothing, pillows, ect.) as these will act as padding against your back. Subsequent layers should be packed such that the heaviest items (pots and pans) are in the middle and that the weight is balanced from left to right. I’ve found that packing smaller items into dry bags can help to consolidate them within the Yukon pack.
Important note: Any items needed along the haul (water bottles, map, compass, ect.) should be left unpacked as it’s difficult to access items within the pack without fully disassembling it!
Step 2: Fold Your Yukon Pack
Once all of your items have been laid out on the tarp it’s time to wrap them up like a giant Pot Sticker! Fold the tarp up in the following order: left, right, bottom top. Make sure to fold the tarp tightly such that the gear doesn’t become loose and move around inside.
Step 3: Tie the Top Knot
The most complicated part of constructing a Yukon pack is tying the “top knot.” This knot is the key point of the wrap and will eventually support the arm straps. It took me a few tries to get this knot correct so I recommend practicing at home to save time and frustration in the backcountry!
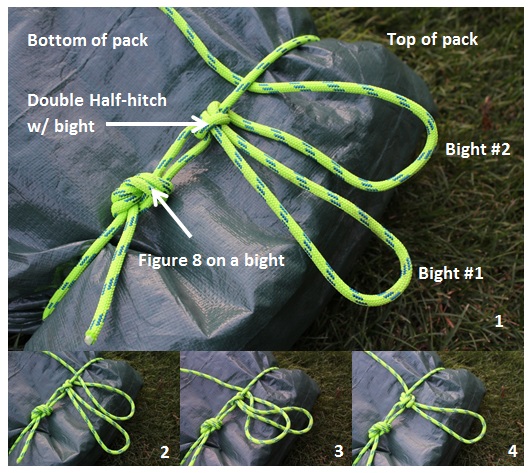
Start by tying a figure 8 on a bight into one end of the rope or parachute cord. Wrap the rope around the tarp, feed it through the bight, and cinch it down to tighten. Then secure this knot by tying a double half-hitch with a bight (Bight #1) as shown in the Panel 1 of the image below.
To create the rest of “top knot” pull a second bight (Bight #2) through to the right of Bight #1 as shown in Panel 1. Twist Bight #2 one half turn as shown in Panel 2. Slip Bight #1 through Bight #2 as shown in Panel 3. Complete the top knot by pulling Bight #2 tight. Confused??? That’s, OK…I was too the first dozen times! Following the pictures should get you there eventually J
Step 4: Wrap Your Yukon Pack
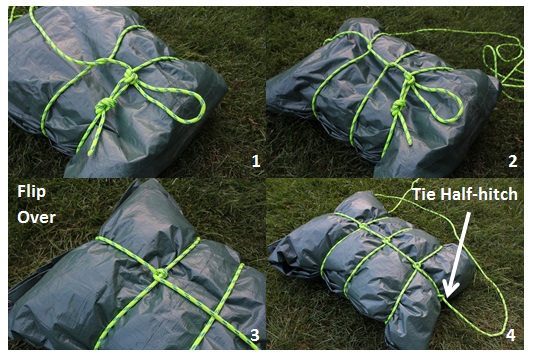
Once the top knot is complete you’re ready to wrap up your Yukon pack! Start on the outside part of the pack (the side that doesn’t touch your back). Wrap the rope tightly around the pack and back through the loop that this creates as shown in Panel 1 below. Repeat this step 3-4 times as shown in Panel 2. This should be enough wraps to secure the pack.
Next, flip the pack over to compete the wrap on the inside part of the pack (the side that touches your back). This can be done by weaving a knot into each of the horizontal wraps as shown in Panel 3. Once this is complete, simply pull the excess rope through the top knot and secure the wrap with half-hitch or two as shown in Panel 4.
Step 5: Attach/ Create the Shoulder Straps
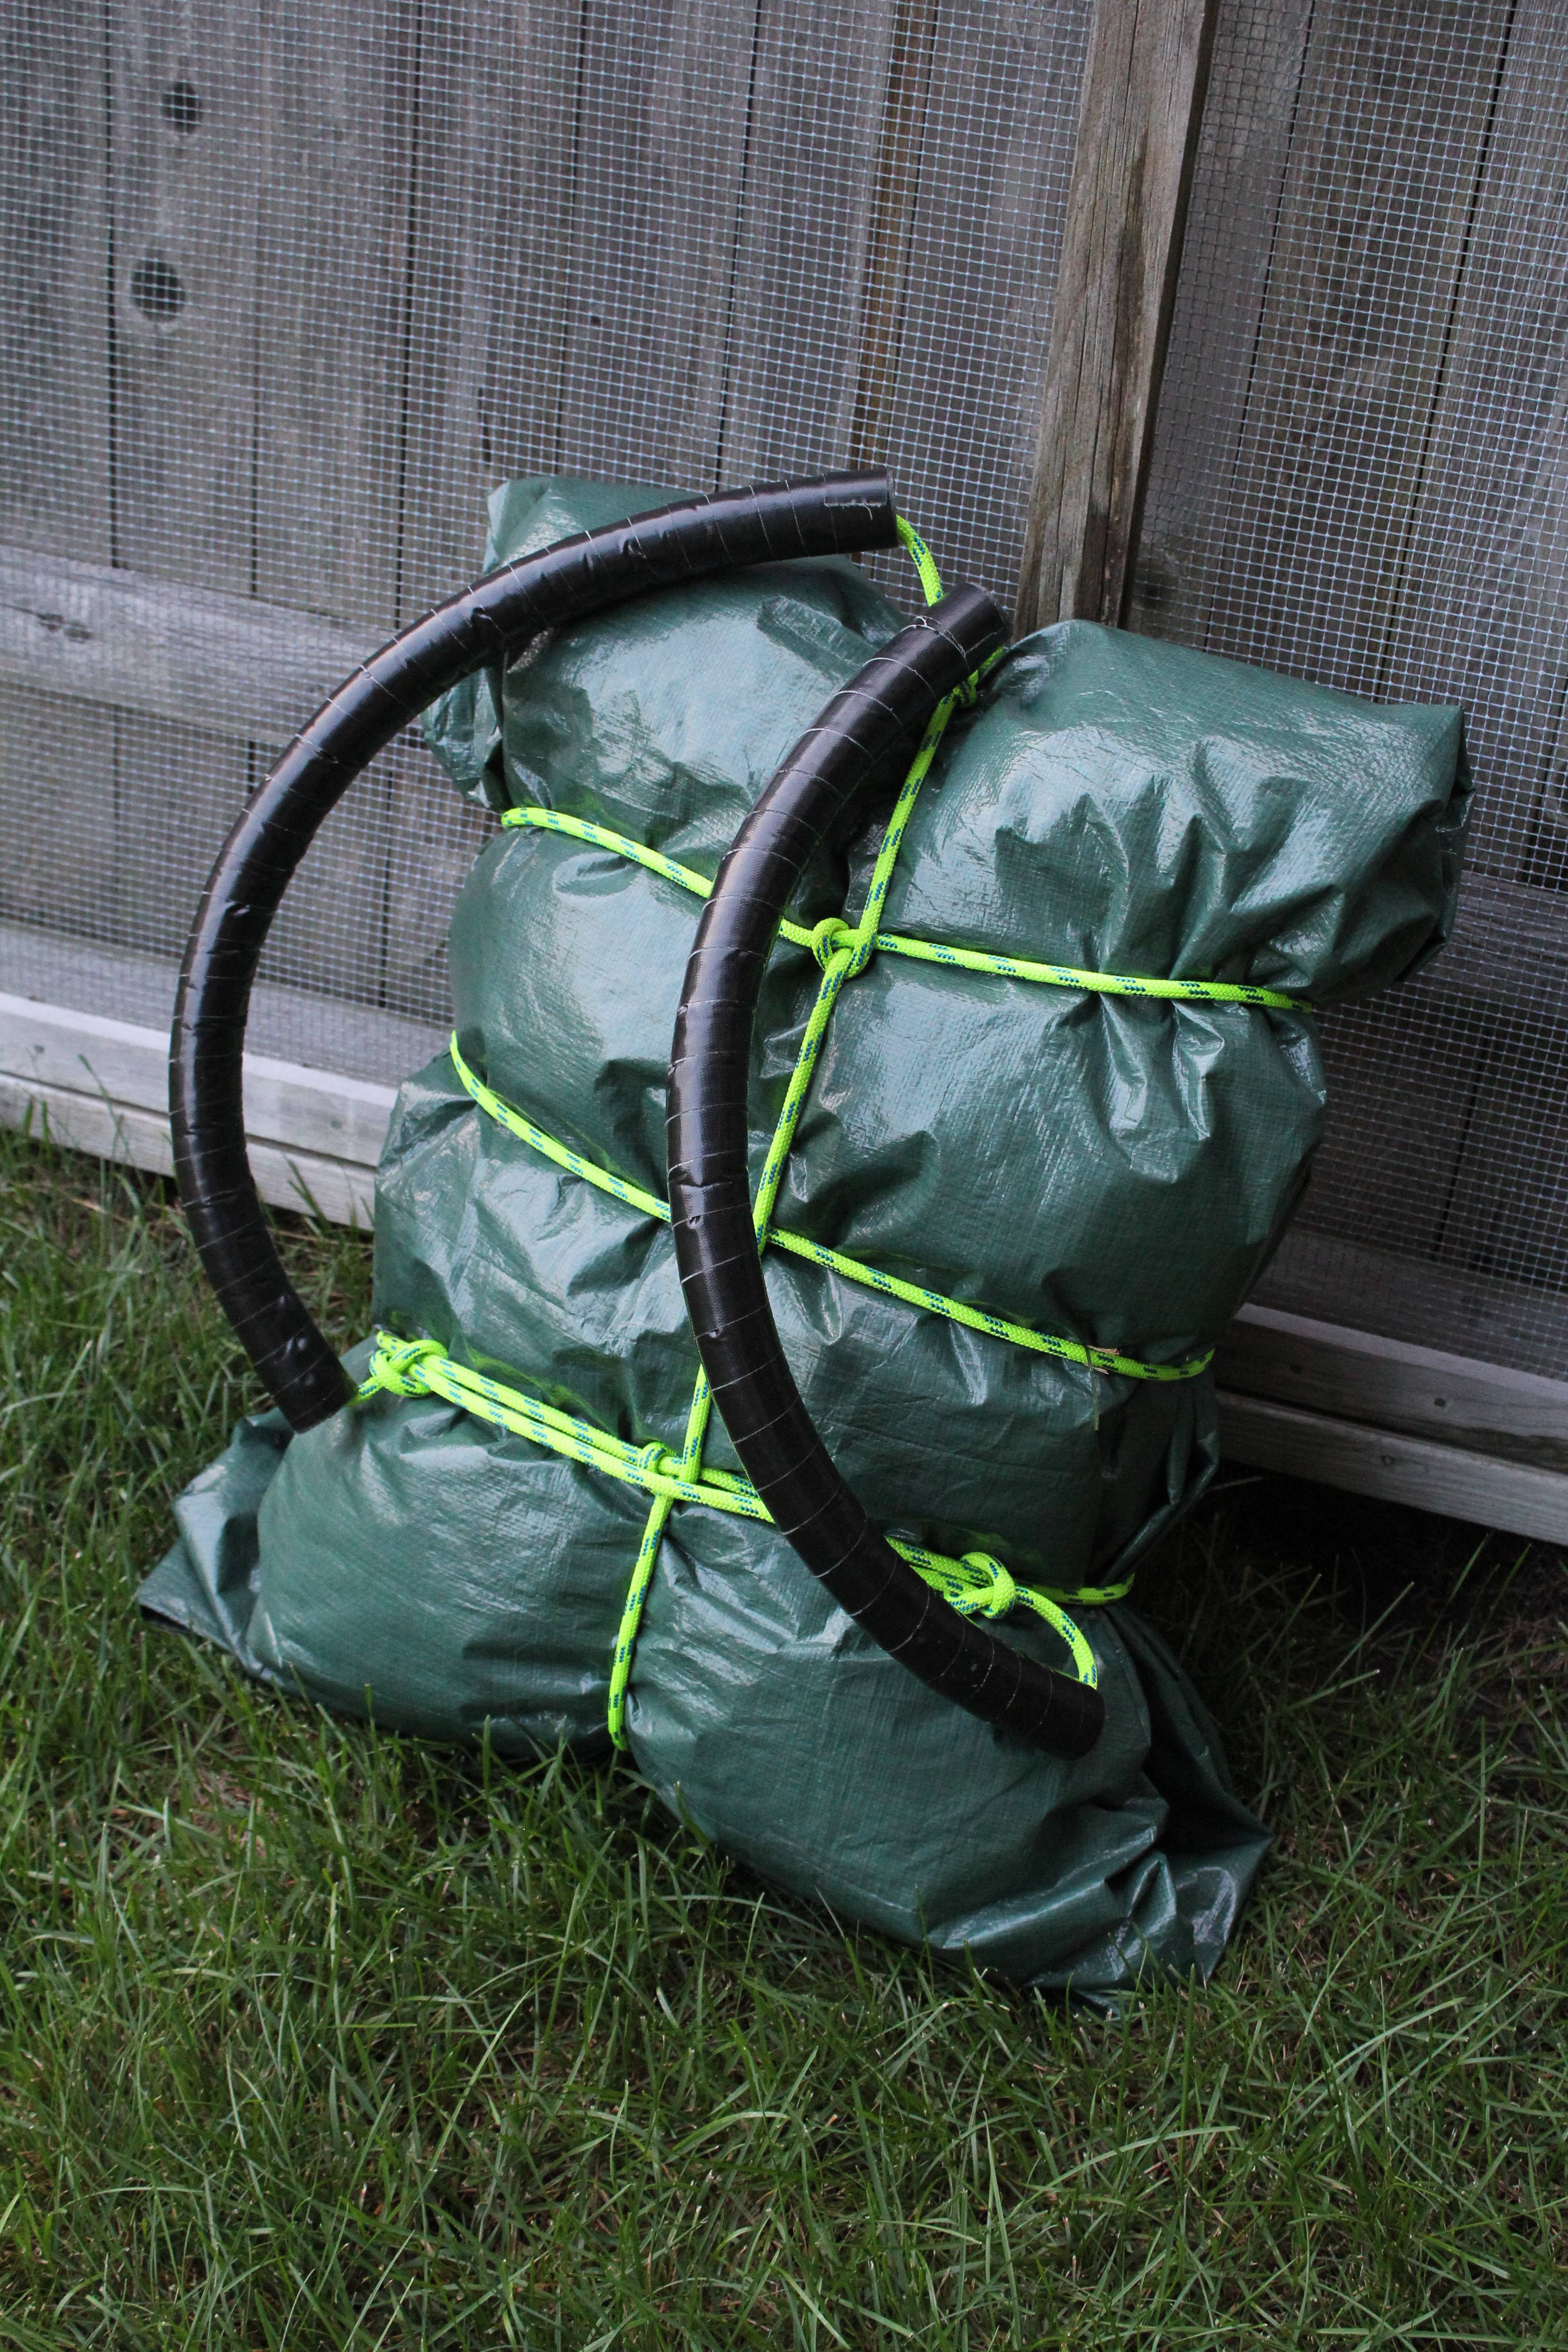
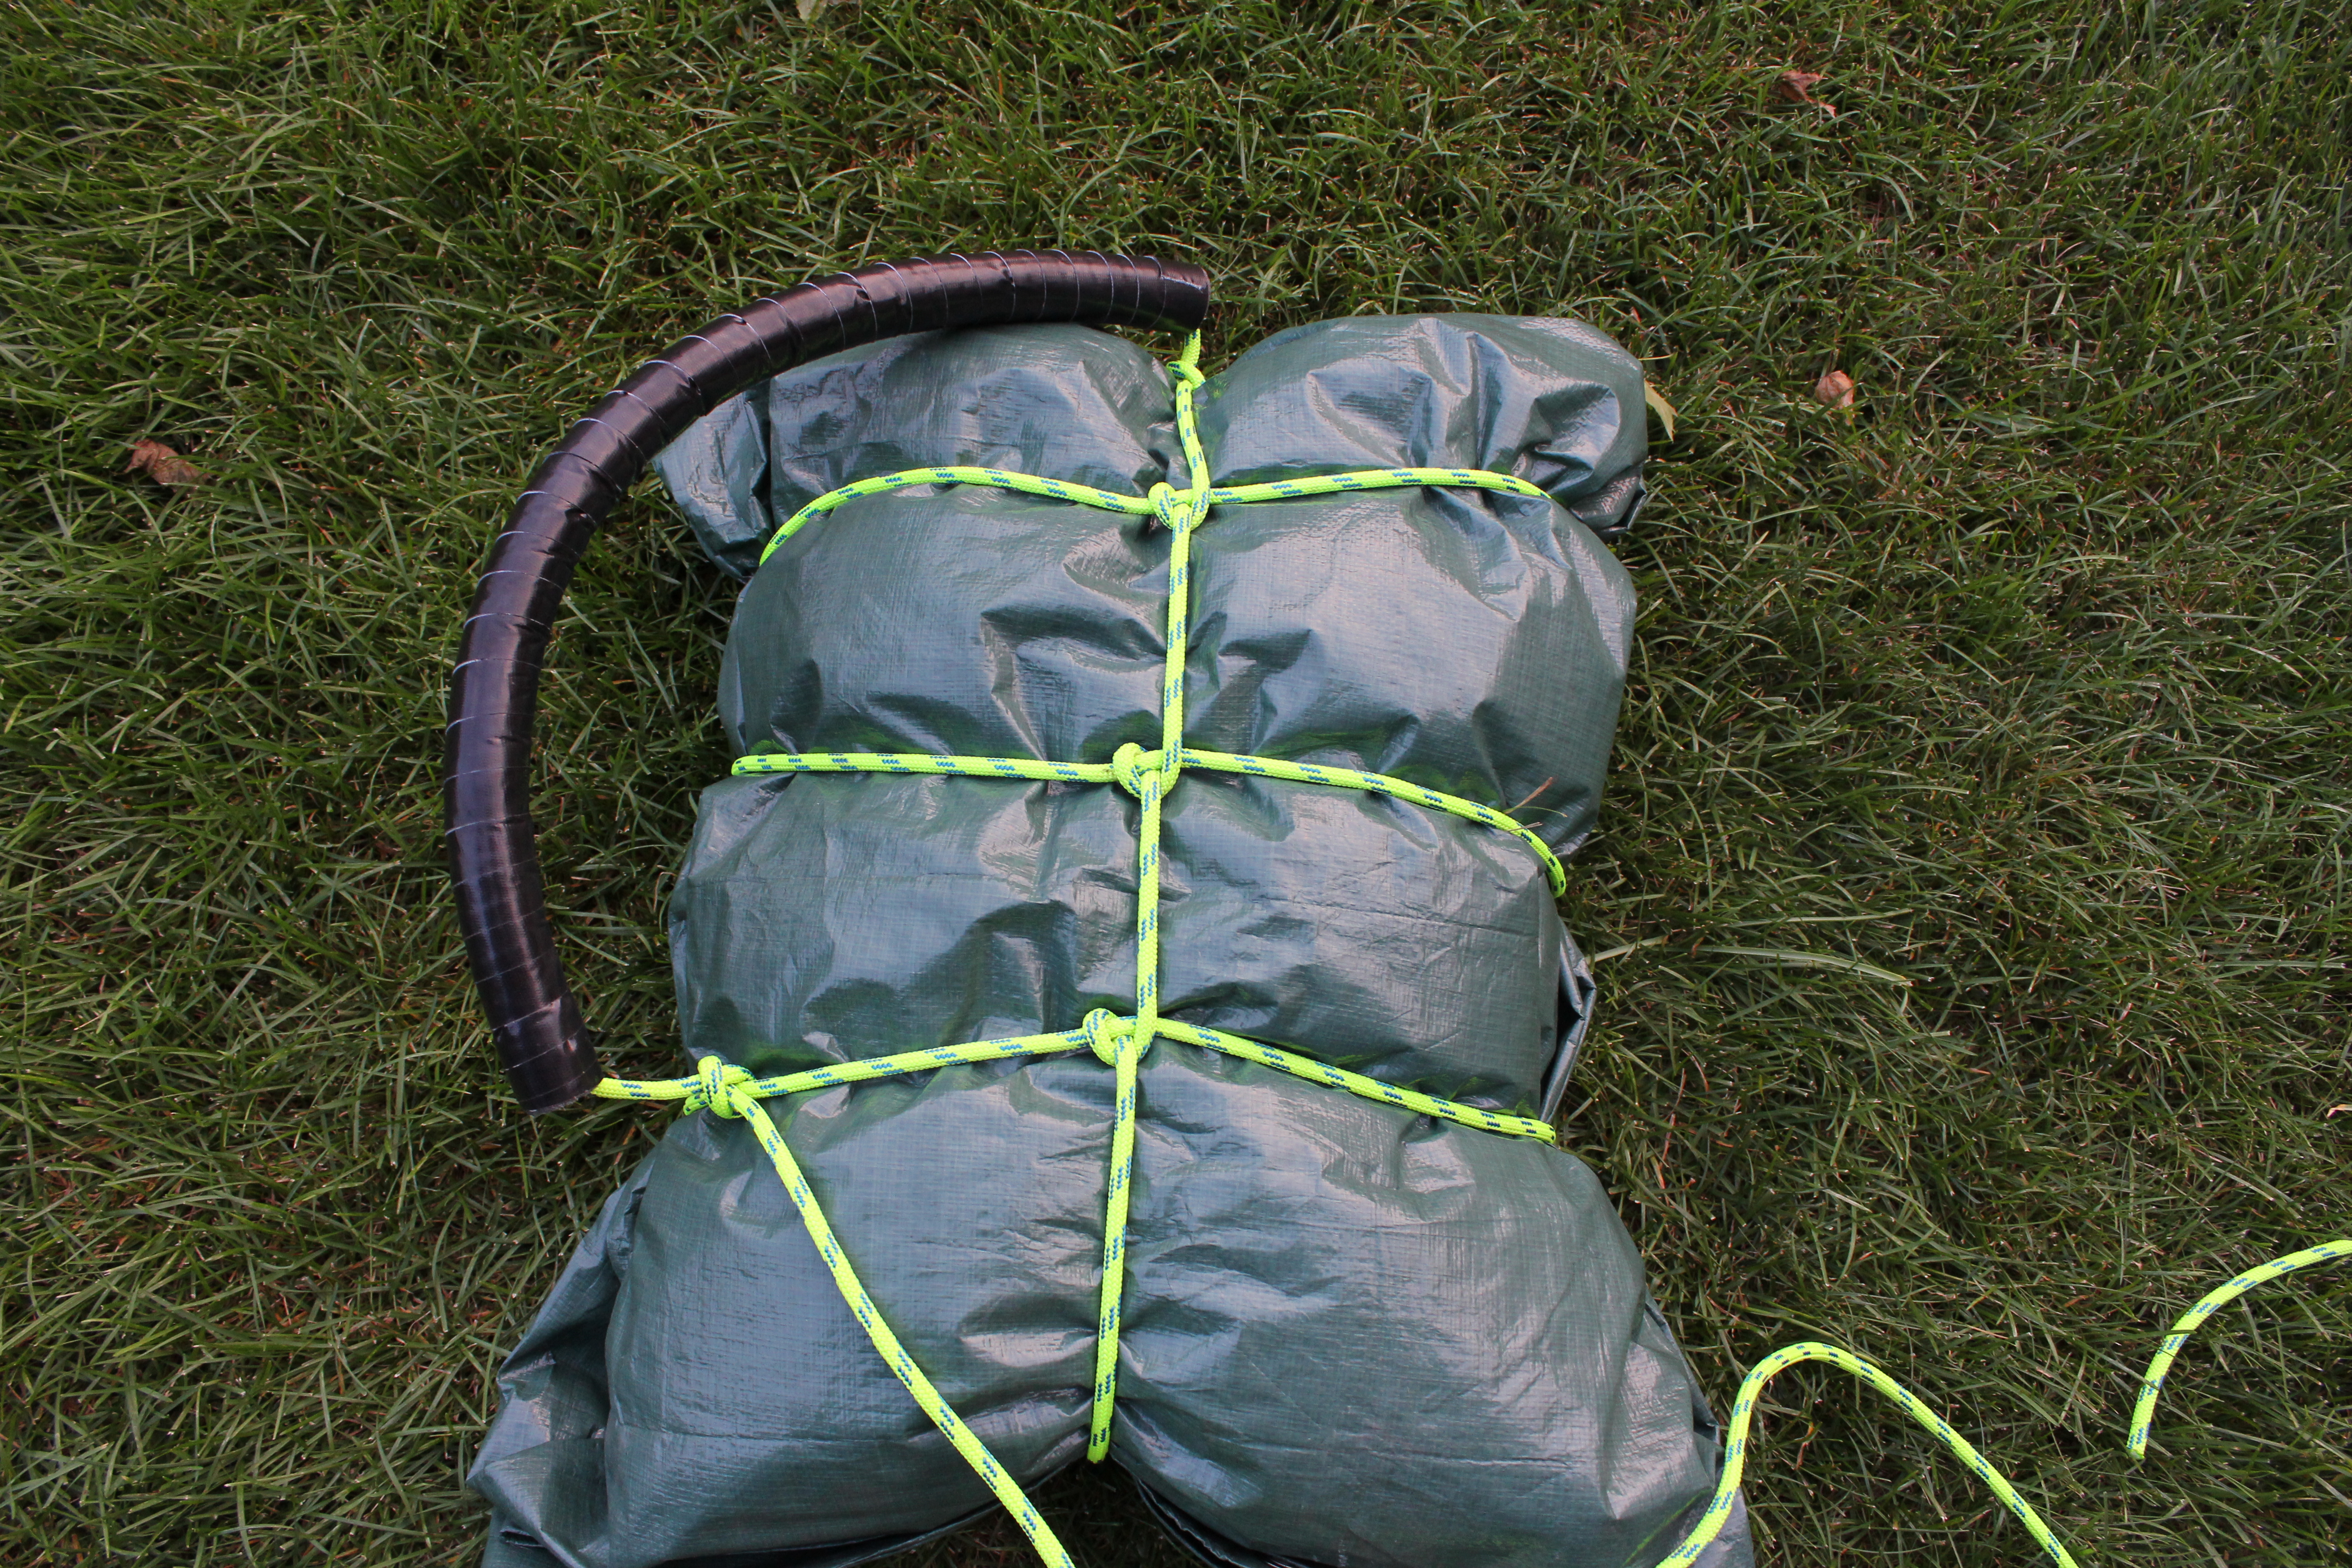
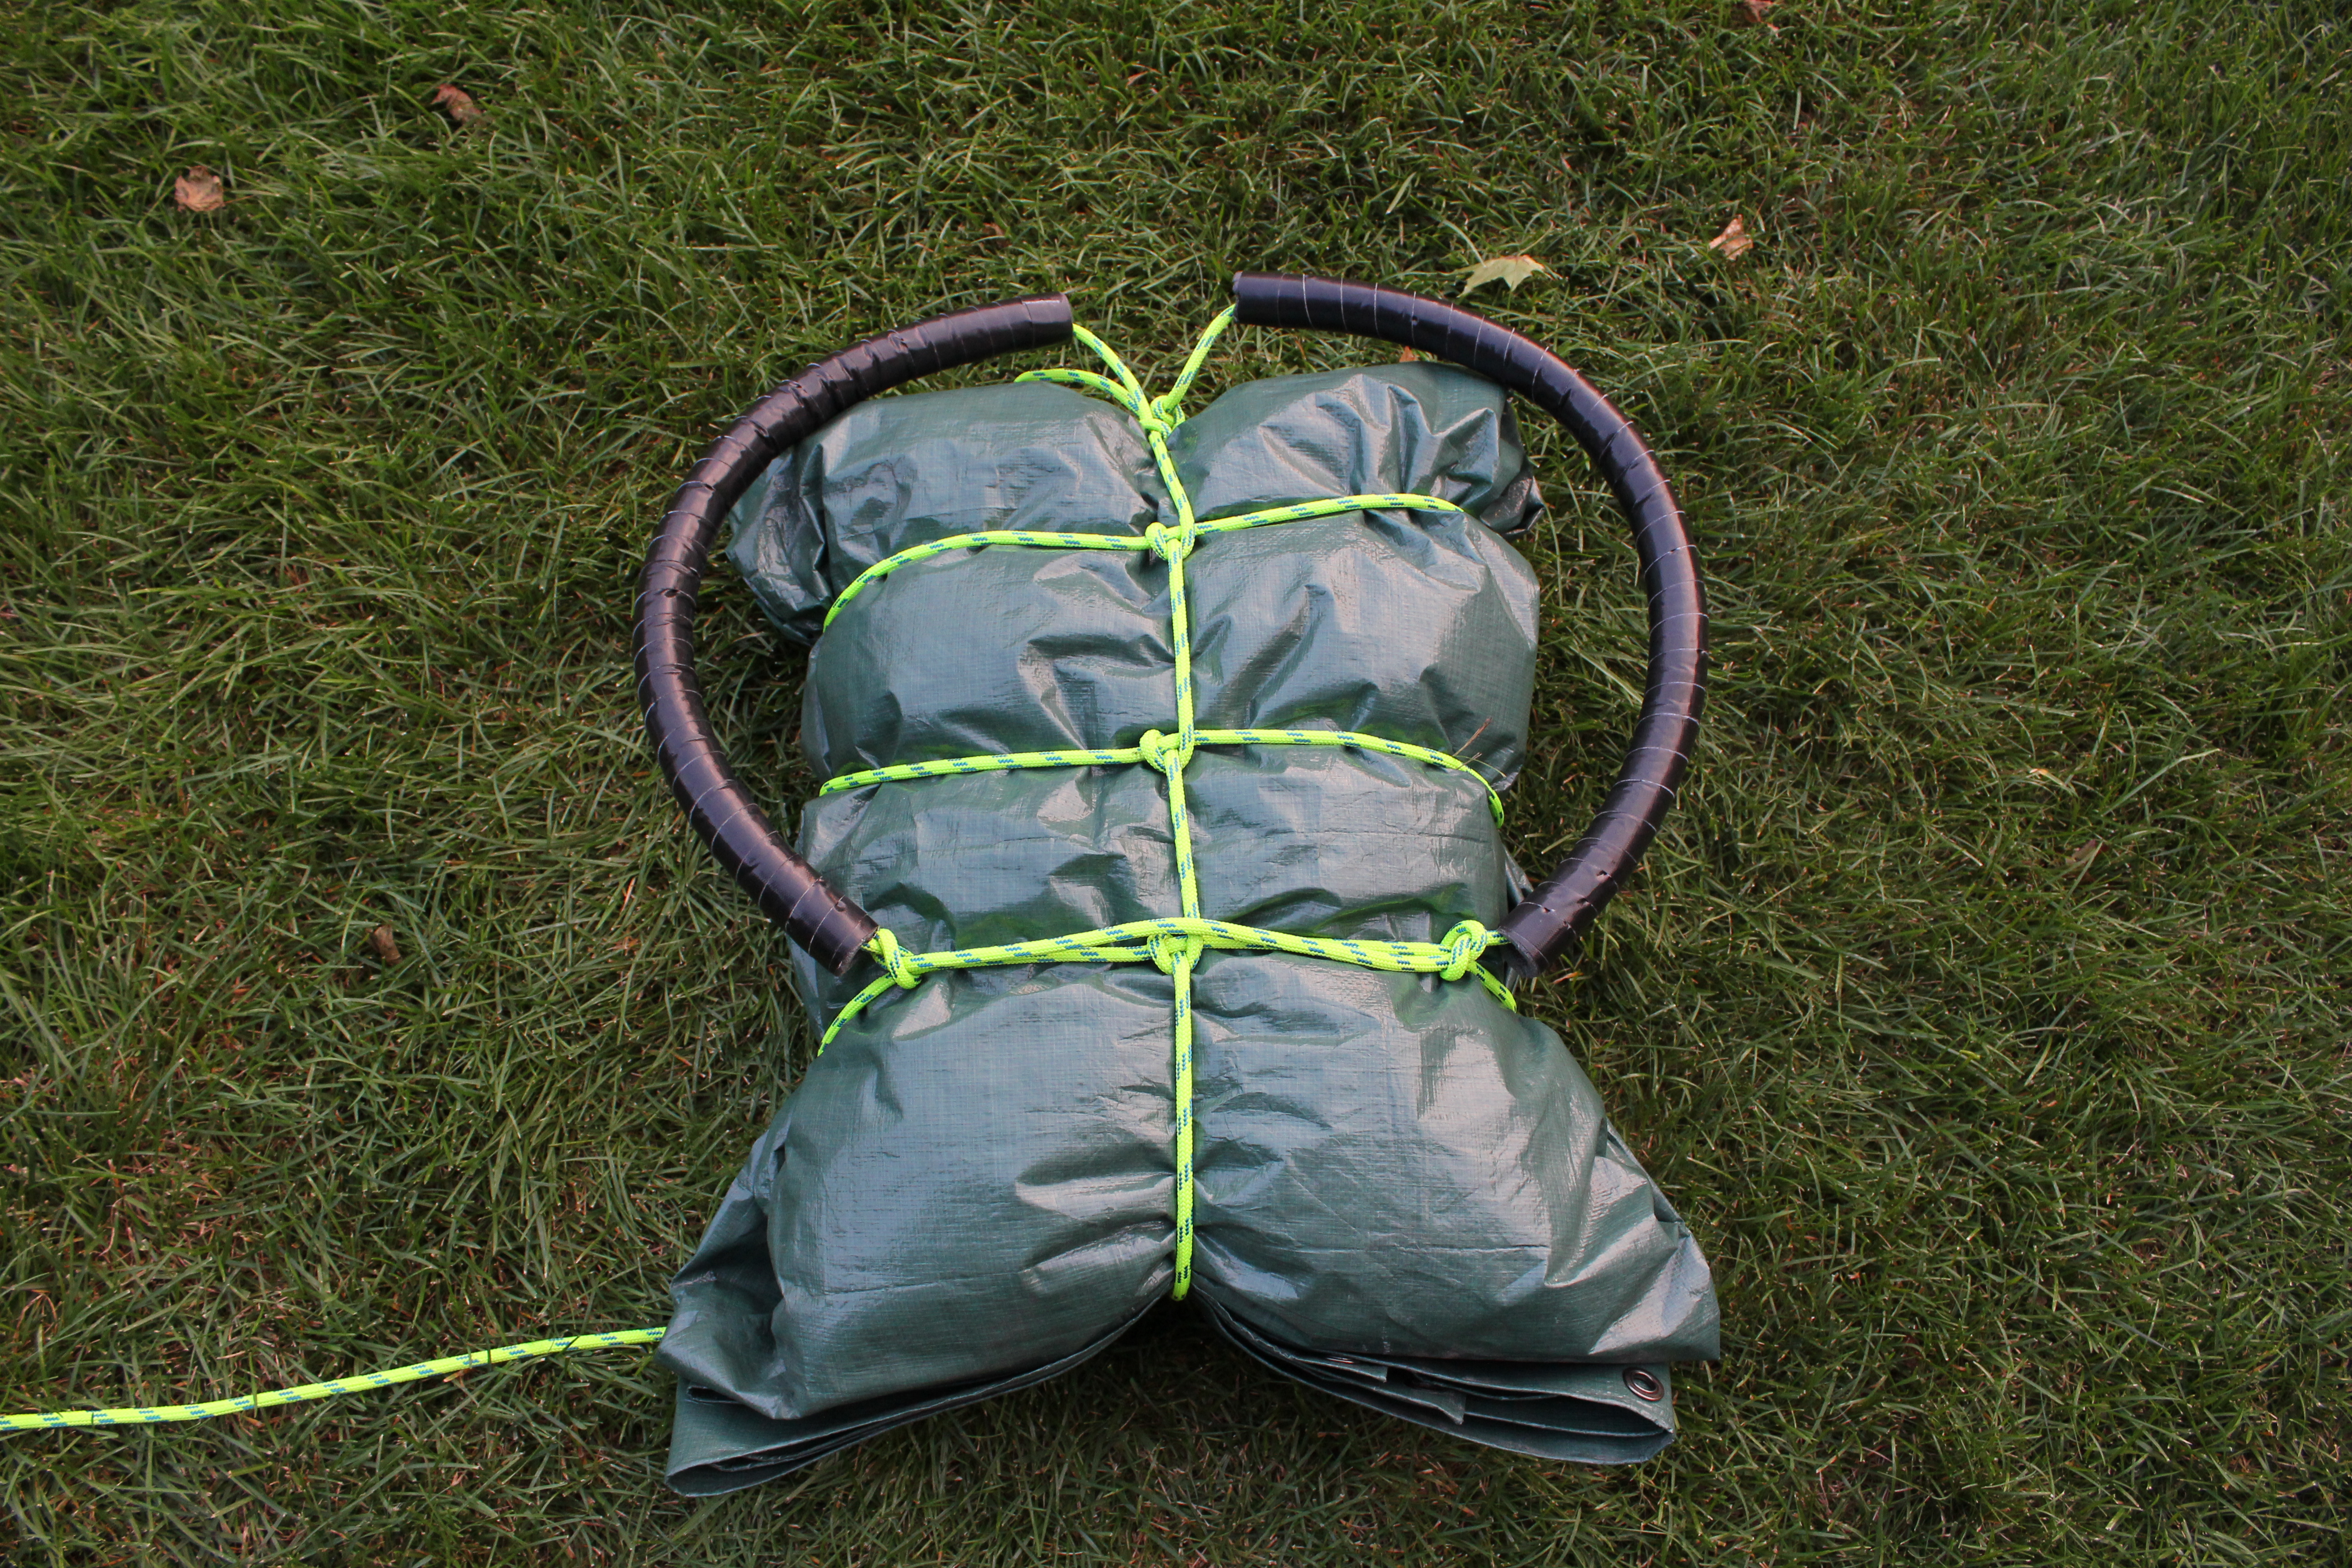
There are many ways to create straps for your Yukon pack. The easiest (and cheapest) way is to utilize the remaining length of rope from the wrap. I find that rope along really cuts into your shoulders especially when the pack is heavy or the haul is long. For this reason, I fashioned some cheap shoulder strap pads by wrapping two 18inch lengths of ½ inch pipe insulation in heavy-duty duct tape. I find that these home-made pads are comfortable, very light weight, and readily stowed in the kayak. Others have used old-belts or commercially available shoulder straps for a more comfortable carry.
To attach the shoulder straps simply thread the excess rope from the top-knot through the shoulder strap and secure to the lowest wrap with an overhand knot as shown in the image below. Run the rope along the lowest wrap to the opposite side of the pack and tie a second overhand knot. Feed the rope through the second strap and secure to the top knot with a few half hitches. You can either stuff any excess rope away if the load is light or use it to fashion a waist strap if the load is heavy.
Check out these excellent videos on How to Build a Yukon Pack: Video #1 and Video #2
Tips and Tricks:
- Take care in packing such that soft items are against your back and the weight within the pack is evenly distributed side-to-side.
- Use a dry bag to further waterproof and contain your small items within the pack.
- Leave items that you may need on the haul out of the pack as it’s hard to get at items inside the pack without completely unwrapping it.
- A blanket may be used in place of the tarp although it will be less waterproof.
- Wrap the pack tightly and at least 3-4 times for maximum security.
- Use pipe insulation as a low-cost option for shoulder strap paddling.
- Keep the load light for maximum comfort on long-distance hauls.
- Practice constructing Yukon packs before entering the backcountry.
Yukon Pack vs. Other Portage Packs:
Pros:
- You don’t have to carry the extra weight of a backpack amongst your gear.
- The Yukon pack materials can double to make a tarp shelter.
- They are much less expensive than most portage packs on the market.
Cons:
- It can be a real pain to get into a Yukon pack without taking it apart.
- They can take a considerable amount of time to build
- They may be less comfortable to carry depending on the construction method used.
I hope that you find this tutorial interesting and helpful in your future Yukon Pack-building endeavors. I’m certainly looking forward to my next “All Yukon Pack” adventure and I hope that you’ll try this sometime too!
Happy Portaging!
-Kayak Dave



3 Responses to How to Build a Yukon Portage Pack